





































Construction Site Tools

Free UK construction site tools & calculators. Work out materials in seconds — concrete, bricks, plasterboard, gravel, decking, fencing and more — plus site-engineer tools, a drawing take-off measurer and printable QS templates. UK sizes, no sign-up.

Advertisement  ·  728×90 leaderboard slot

Material Calculators

The tools people search for most — UK standard sizes and waste allowances built in. Pick what you're ordering.

Concrete Calculator

Volume plus an estimate of 20kg ready-mix bags.

Concrete required

Brick & Block Calculator

60 bricks/m² or 10 blocks/m² for a single skin, plus wastage.

Units required

Mortar Calculator

Approx. 0.5 m³ of mortar per 1,000 bricks, with a rough bag count of mixed mortar.

Mortar required

Gravel / Aggregate Calculator

Volume, tonnage and bulk bags for gravel, stone or decorative aggregate.

Aggregate required

Sub-base (MOT Type 1)

Tonnage of MOT Type 1 by area and depth. Default density 2.1 t/m³.

Material required

Plasterboard Calculator

Boards, screws and tape, with a visual sheet layout showing how the boards cut in and where the off-cuts fall. UK standard board 2400×1200mm.

Boards to cover the wall
board on wall off-cut / waste

Paint Calculator

Litres and tins (UK 2.5L/5L) for the area and number of coats.

Paint required

Tile Calculator

Number of tiles, adhesive and grout for floors or walls.

Tiles required

Fencing Calculator

Panels, posts, gravel boards and postcrete for a run of fence.

Panels required

Decking Calculator

Boards and joists for a deck. Default 150mm boards with a 5mm gap, joists at 400mm centres.

Deck boards required
deck board joist line / board join

Turf & Topsoil Calculator

Turf rolls (≈1 m² each) and topsoil tonnage for a lawn area.

Turf required

Stud Wall Calculator

Timber and plasterboard for a timber stud partition. Studs at chosen centres, one row of noggins, board both sides.

Vertical studs

Floor Screed

Volume and approximate tonnage of sand:cement screed.

Screed required

Tarmac / Asphalt

Tonnage by area and compacted depth. Default density 2.36 t/m³.

Asphalt required

Skip / Muck-away

Bulked volume of arisings and an estimate of skip / grab loads.

Bulked arisings

Site Engineer Tools

Geometry, setting out, levels and programme for the people running the works.

Area Calculator

Pick a shape, get the area.

Area

Volume Calculator

Boxes, trenches, cylinders and more.

Volume

Gradient & Fall

Run and fall to gradient ratio, percentage and angle. Handy for drainage and ramps.

Gradient

Setting Out — Diagonal Check

Diagonal of a rectangle to prove a 90° corner (3:4:5 principle).

Diagonal must read

Reduced Levels (HPC)

RL = (Benchmark + Backsight) − Foresight.

Reduced level of point

Rebar Weight

Steel weight using d²/162, totalled by length and quantity.

Total steel weight

Bulking / Compaction

In-situ volume to bulked or compacted volume.

Resulting volume

Programme Days

Finish date from a start date plus working days (weekends excluded).

Finish on

Drawing Take-off Tool

Upload a plan and measure lengths and areas directly in your browser. Calibrate the scale off any known dimension, then click around the drawing. Exports to Excel. Nothing leaves your device.

Drawing Take-off / Measure Tool

Upload a plan (image or PDF). Set the scale by clicking two points a known distance apart, then measure lengths and areas. Runs entirely on your device — nothing is uploaded to a server.

Scale: not set
Upload a drawing to begin
Current: —

Template Shop

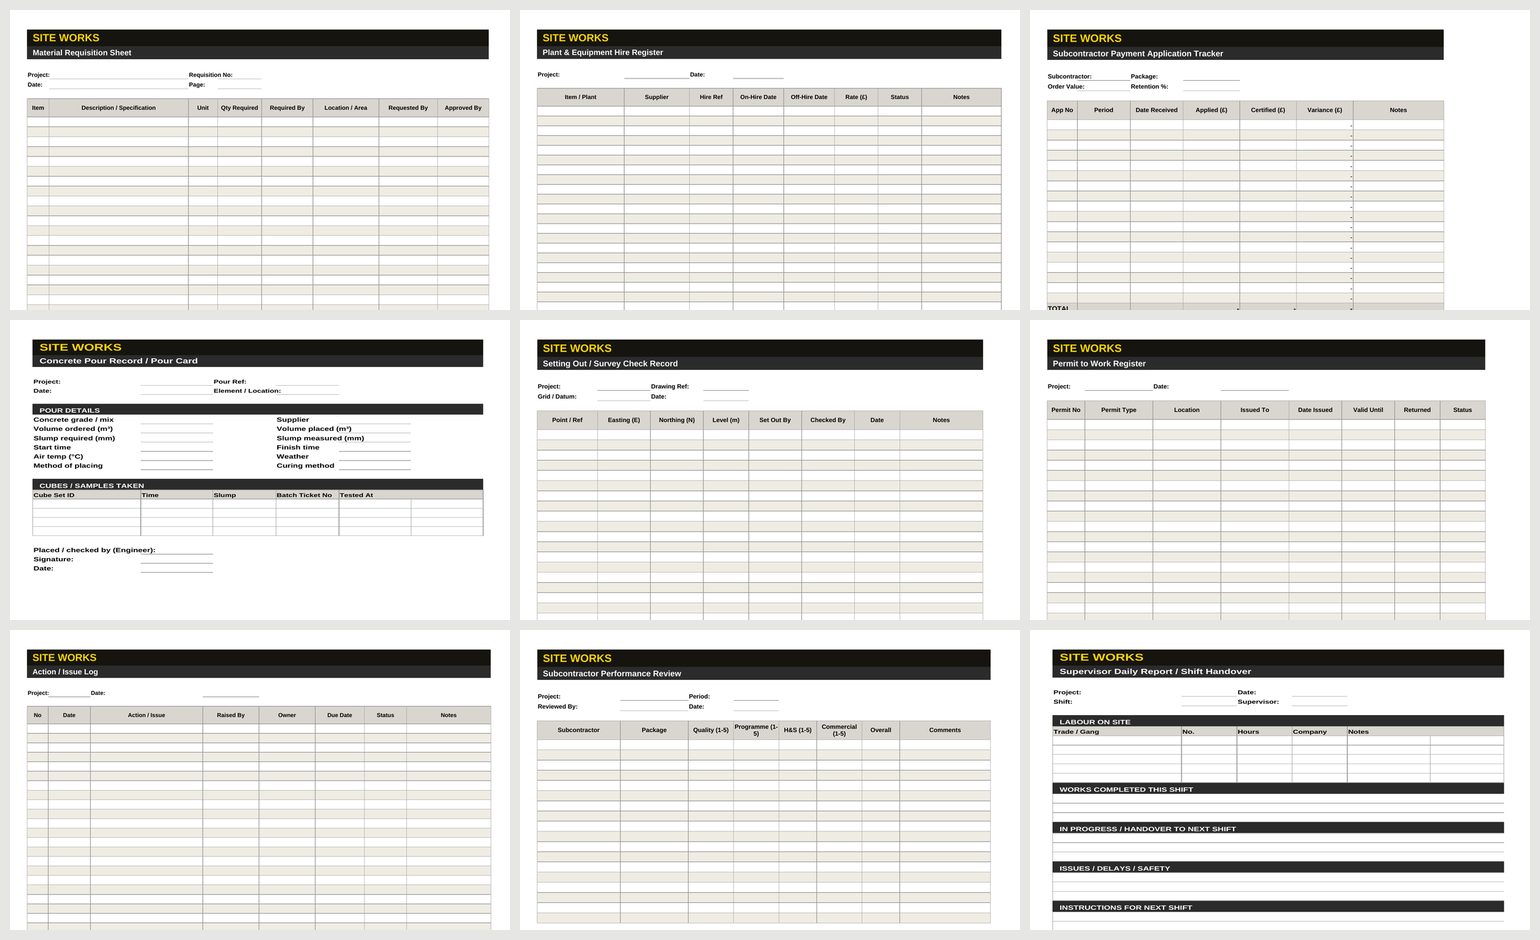
38 professional Excel templates covering every site role — the documents people fill in every single day. UK practice, instant download, works in Excel & Google Sheets. No subscription.

Best value
Full Site Pack preview
Everything

The Full Site Pack

  • All 38 templates
  • All six role sets included
  • Free updates for life
£44.99 one-off
Buy & download
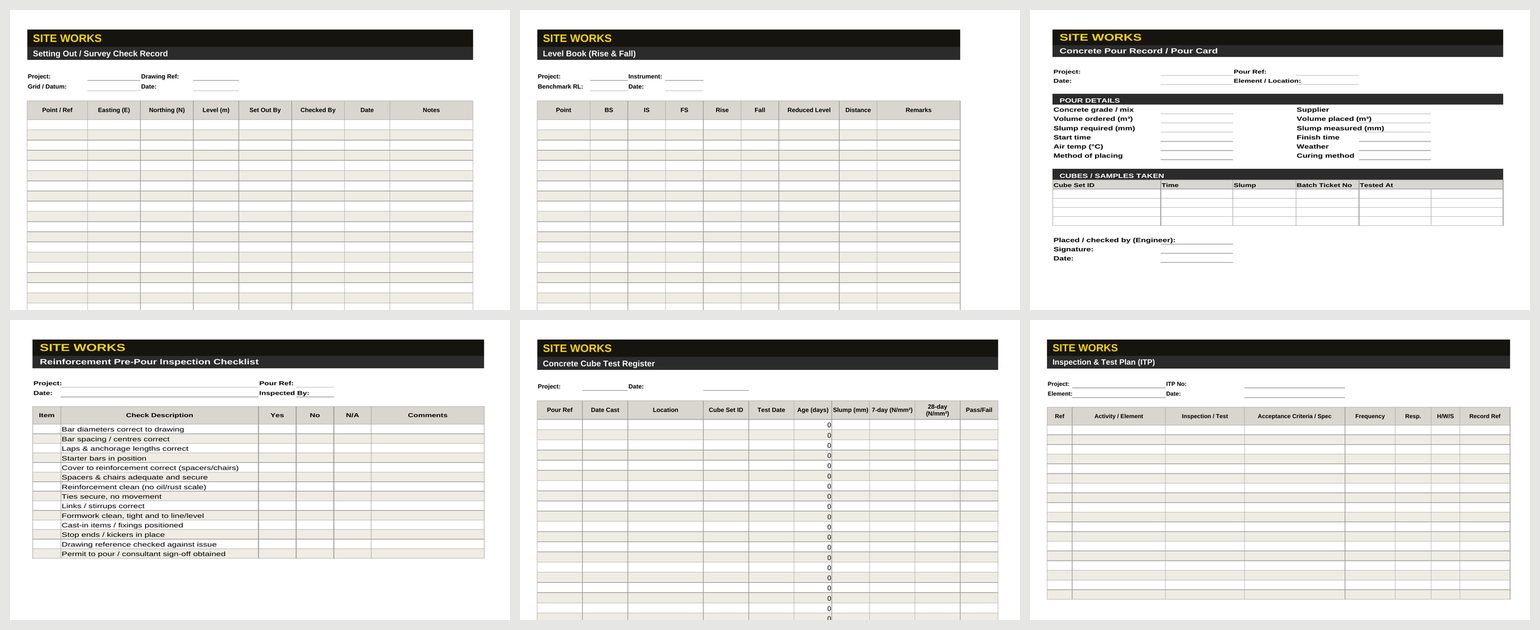
Engineer Pack preview
Site Engineer

Engineer Pack

  • Pour record · Rebar check · ITP
  • Cube register · Setting out
  • Level book · Snagging
£14.99 7 sheets
Buy & download
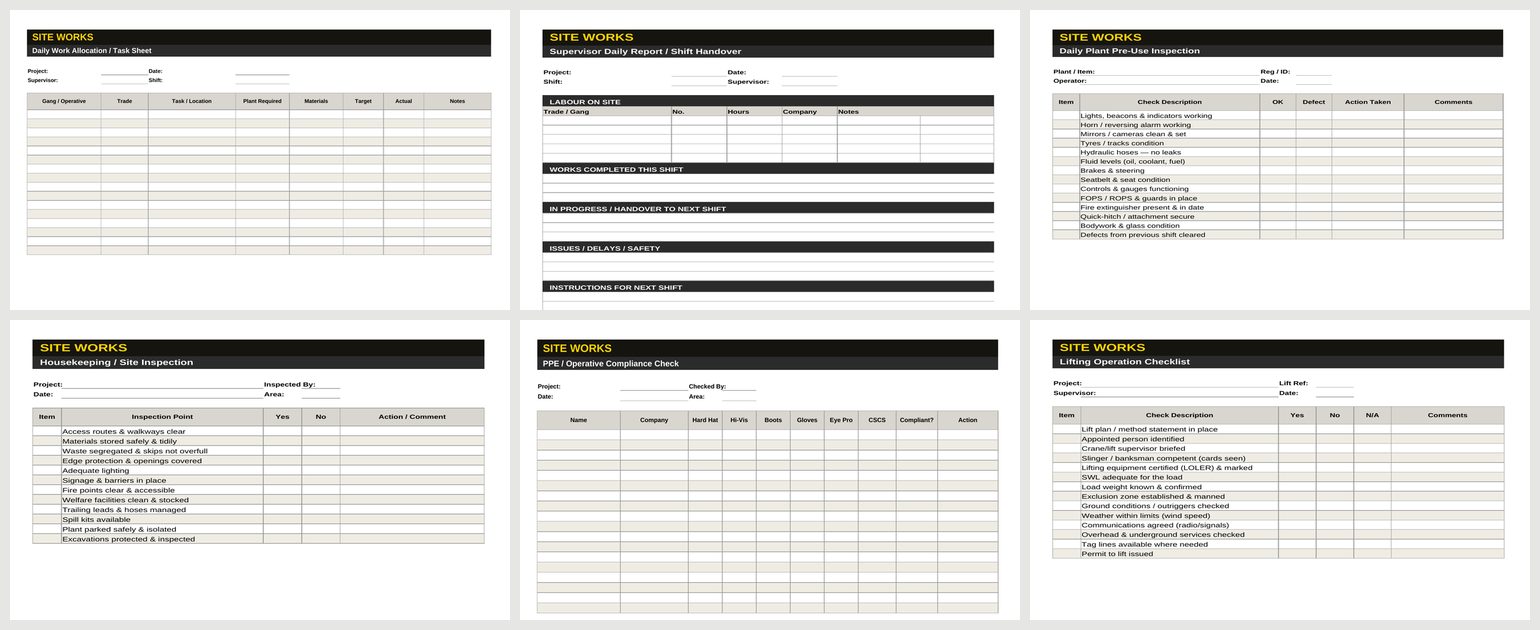
Supervisor Pack preview
Site Supervisor

Supervisor Pack

  • Work allocation · Daily report
  • Plant inspection · Housekeeping
  • PPE check · Lifting checklist
£12.99 6 sheets
Buy & download
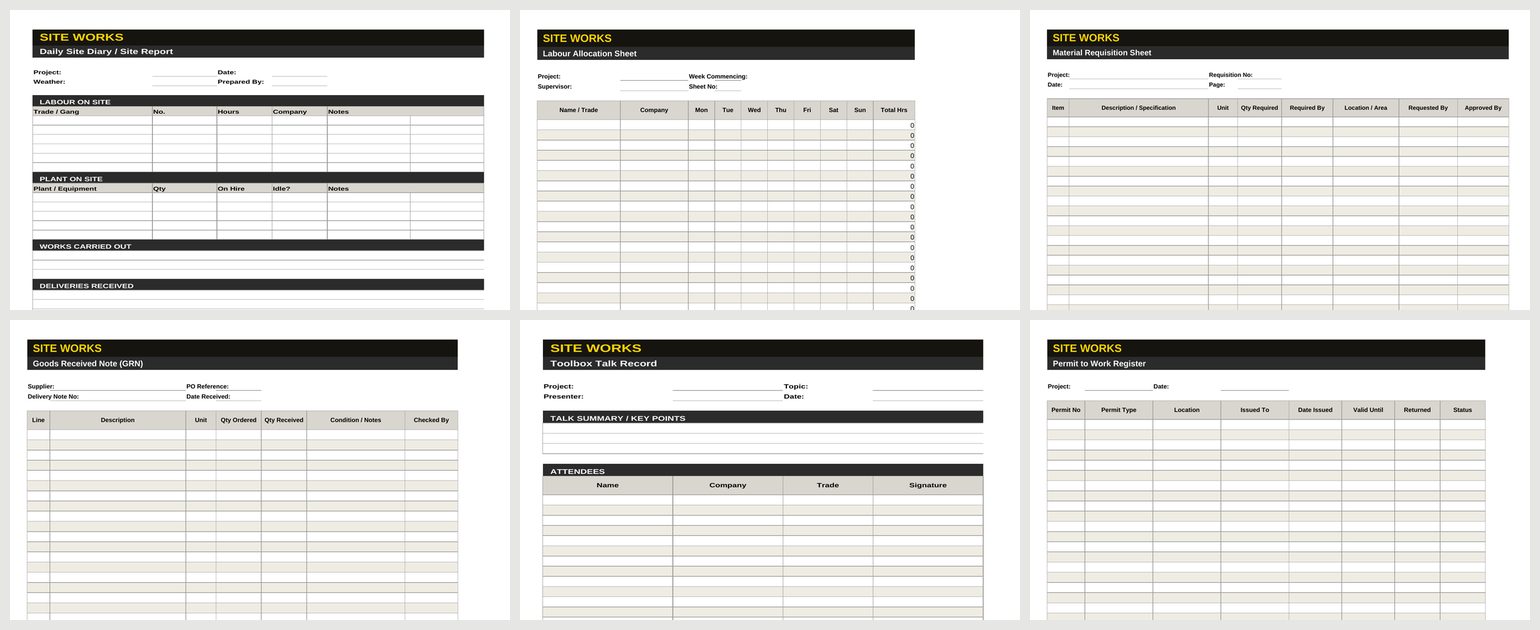
Manager Pack preview
Site Manager & Agent

Manager Pack

  • Diary · Progress · Labour · Plant
  • Requisition · PO · GRN · Instruction
  • Toolbox · Induction · Permits · RFI
£19.99 13 sheets
Buy & download
PM & Agent Pack preview
Project Manager & Site Agent

PM & Agent Pack

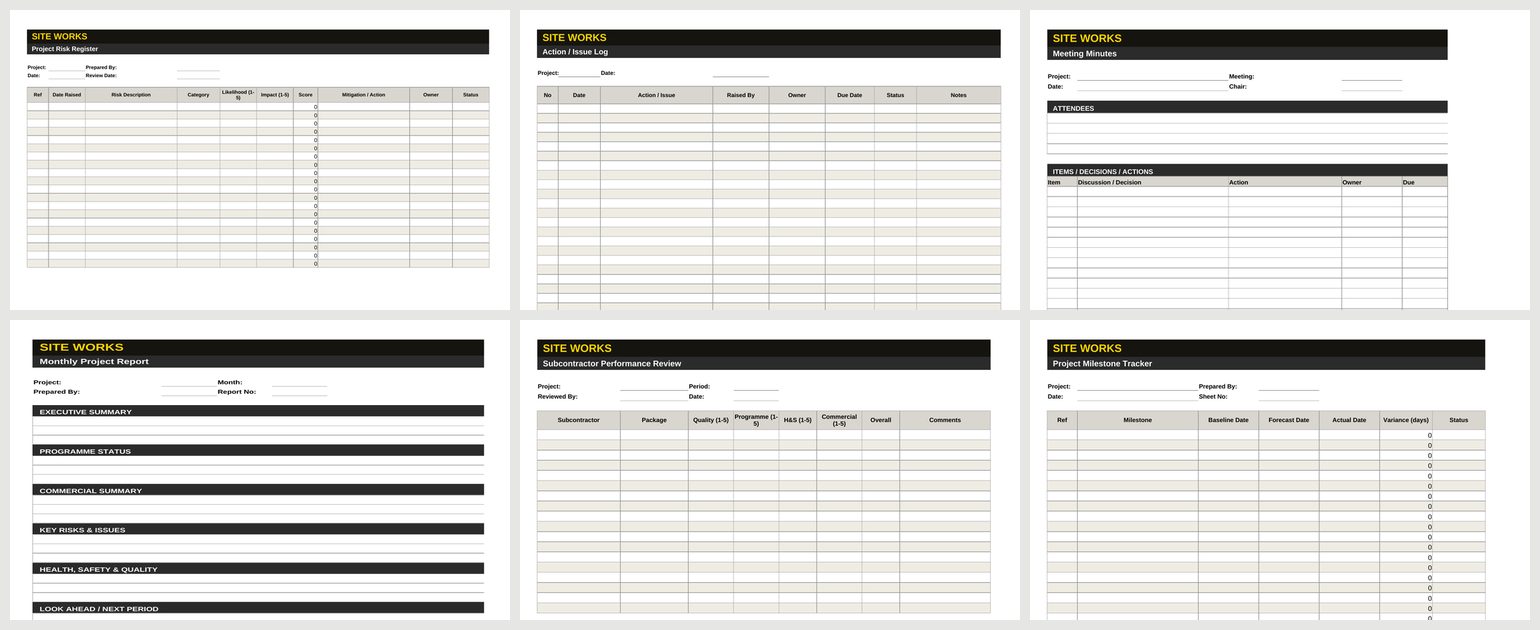
  • Risk register · Action log
  • Meeting minutes · Look-ahead
  • Monthly report · Budget vs actual
£17.99 8 sheets
Buy & download
Commercial Pack preview
Quantity Surveyor

Commercial Pack

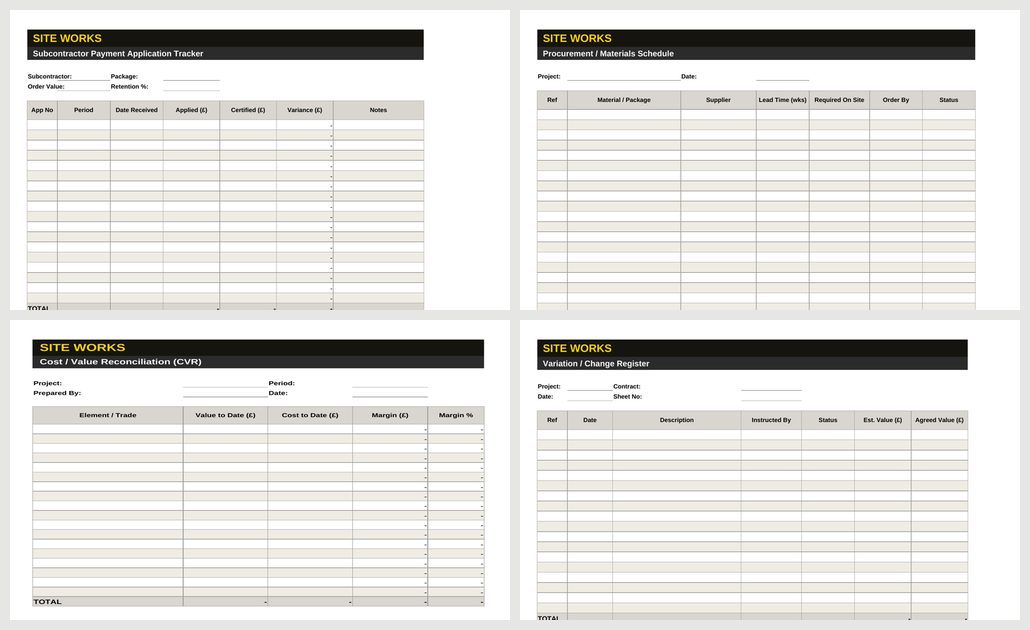
  • Payment tracker · Procurement
  • CVR · Variation register
£12.99 4 sheets
Buy & download

Prefer to pick individual sheets? Browse by role below — £3.99 each.

Site Engineer survey · concrete · quality
Setting Out / Survey Check Record
Site Engineer
Setting Out / Survey Check Record

A clean record sheet for logging setting out and survey check data on site. Records point references, eastings, northings, levels, who set out and who checked — essential for QA and dispute resolution.

£3.99 Buy
Level Book (Rise & Fall)
Site Engineer
Level Book (Rise & Fall)

A structured level booking sheet using the rise and fall method, complete with arithmetic check formulas. Enter your backsights, intermediate sights and foresights and the sheet checks your closing error automatically.

£3.99 Buy
Concrete Pour Record / Pour Card
Site Engineer
Concrete Pour Record / Pour Card

A comprehensive pour card recording mix design, supplier, volumes, slump readings, cube sets, weather, times, curing method and engineer sign-off. Keeps quality records clean and auditable on every pour.

£3.99 Buy
Reinforcement Pre-Pour Inspection
Site Engineer
Reinforcement Pre-Pour Inspection

A pre-pour rebar checklist pre-filled with 14 standard checks covering bar sizes, spacing, laps, cover, chairs, formwork and permit to pour. Tick Yes/No/N/A, note actions, sign off before every pour.

£3.99 Buy
Concrete Cube Test Register
Site Engineer
Concrete Cube Test Register

A running register for concrete cube sample data across a project. Logs pour reference, date cast, location, cube set ID, test date, age in days (auto-calculated), slump, 7-day and 28-day results.

£3.99 Buy
Inspection & Test Plan (ITP)
Site Engineer
Inspection & Test Plan (ITP)

A professional ITP for defining quality inspection and testing by element or activity. Records inspection type, acceptance criteria, frequency, responsible party and hold/witness/surveillance point.

£3.99 Buy
Snagging / Defects List
Site Engineer
Snagging / Defects List

A clear structured snagging list for defects and outstanding works. Captures location, description, responsible trade, date raised, target date, status and sign-off. Works for pre-handover and post-completion.

£3.99 Buy
Site Supervisor daily ops · safety · plant
Daily Work Allocation / Task Sheet
Site Supervisor
Daily Work Allocation / Task Sheet

A daily task sheet for allocating work to gangs at the start of each shift. Records name, trade, task location, plant and materials required, target output and actual achieved.

£3.99 Buy
Supervisor Daily Report / Handover
Site Supervisor
Supervisor Daily Report / Handover

A structured shift report and handover document. Records labour on site, works completed, items to hand over, issues and delays, and instructions for the next shift.

£3.99 Buy
Daily Plant Pre-Use Inspection
Site Supervisor
Daily Plant Pre-Use Inspection

A daily plant inspection checklist pre-filled with 14 standard checks covering lights, mirrors, hydraulics, fluid levels, brakes, seatbelt, FOPS/ROPS and fire extinguisher. Meets PUWER requirements.

£3.99 Buy
Housekeeping / Site Inspection
Site Supervisor
Housekeeping / Site Inspection

A site housekeeping checklist pre-filled with 12 items covering access routes, material storage, waste, edge protection, lighting, signage, welfare facilities and plant parking.

£3.99 Buy
PPE / Operative Compliance Check
Site Supervisor
PPE / Operative Compliance Check

A compliance record for checking operatives are wearing the correct PPE. Logs name, company, trade, hard hat, hi-vis, boots, gloves, eye protection, CSCS status and overall compliance.

£3.99 Buy
Lifting Operation Checklist
Site Supervisor
Lifting Operation Checklist

A pre-lift checklist pre-filled with 14 checks covering lift plan, appointed person, LOLER certification, SWL, exclusion zone, ground conditions, weather and permit to lift.

£3.99 Buy
Site Manager & Agent logistics · H&S · records
Daily Site Diary
Site Manager & Agent
Daily Site Diary

A comprehensive daily diary recording labour, plant, works carried out, deliveries, visitors and delays. The most important document a site manager keeps — your primary defence in any dispute or delay claim.

£3.99 Buy
Weekly Progress Report
Site Manager & Agent
Weekly Progress Report

A structured weekly report covering summary, activities completed, planned activities, issues and risks, and H&S summary. Professional format suitable for sending directly to clients.

£3.99 Buy
Labour Allocation Sheet
Site Manager & Agent
Labour Allocation Sheet

A weekly labour allocation sheet recording hours per operative across Monday to Sunday with automatic totals. Essential for payroll verification, labour cost tracking and programme reporting.

£3.99 Buy
Plant & Equipment Hire Register
Site Manager & Agent
Plant & Equipment Hire Register

A running register of all plant and equipment on site recording item, supplier, hire reference, on/off-hire dates, rate and status. Keeps hire costs visible and stops plant staying on unnecessarily.

£3.99 Buy
Material Requisition Sheet
Site Manager & Agent
Material Requisition Sheet

A formal material requisition for requesting materials from the buying team. Records item, specification, unit, quantity, required-by date, delivery location and requires approval sign-off.

£3.99 Buy
Purchase Order / Material Order
Site Manager & Agent
Purchase Order / Material Order

A professional purchase order with automatic line total calculations and VAT summary. Records supplier details, PO number, delivery address and line items. Suitable for sending directly to suppliers.

£3.99 Buy
Goods Received Note (GRN)
Site Manager & Agent
Goods Received Note (GRN)

A goods received note for recording deliveries against purchase orders. Logs description, quantity ordered, quantity received and condition. Essential for three-way matching and catching short deliveries.

£3.99 Buy
Site Instruction / CVI
Site Manager & Agent
Site Instruction / CVI

A site instruction and CVI form recording who it is to and from, the instruction text, cost and time implication flags, and signature blocks. Creates a formal record of every instruction.

£3.99 Buy
Toolbox Talk Record
Site Manager & Agent
Toolbox Talk Record

A toolbox talk attendance and content record with space for the topic and key points, then a full attendee table for name, company, trade and signature.

£3.99 Buy
Site Induction Register
Site Manager & Agent
Site Induction Register

A site induction register recording name, company, trade, induction date, who inducted them, CSCS card number and signature. Essential for CDM compliance and insurance purposes.

£3.99 Buy
Permit to Work Register
Site Manager & Agent
Permit to Work Register

A running register of all permits to work issued on site. Records permit type, location, issued to, date issued, valid until, returned and status. Ensures no permits are left open.

£3.99 Buy
Near Miss / Accident Report
Site Manager & Agent
Near Miss / Accident Report

A structured incident report covering details, persons involved, description of events, immediate action, root cause and corrective action. Meets the HSE recommended format for RIDDOR incidents.

£3.99 Buy
RFI Register
Site Manager & Agent
RFI Register

An RFI register tracking all requests for information raised on a project. Records date, subject, raised by, directed to, date required, date answered and status.

£3.99 Buy
Project Manager & Site Agent programme · reporting · cost
Project Risk Register
Project Manager & Site Agent
Project Risk Register

A risk register with automatic probability × impact scoring on a 1–5 scale. Records risk, category, likelihood, impact, auto-calculated score, mitigation actions, owner and status.

£3.99 Buy
Action / Issue Log
Project Manager & Site Agent
Action / Issue Log

A running action and issue log for tracking outstanding items. Records the issue, who raised it, who owns it, due date, status and notes. Essential for project meetings.

£3.99 Buy
Meeting Minutes
Project Manager & Site Agent
Meeting Minutes

A professional meeting minutes template with attendee section and action table recording discussion, decisions, actions, owner and due date. Suitable for site, progress and client meetings.

£3.99 Buy
3-Week Look-Ahead Programme
Project Manager & Site Agent
3-Week Look-Ahead Programme

A simple three-week look-ahead for planning and communicating short-term works. Records activities, responsible trade, planned work across three weekly columns and current status.

£3.99 Buy
Monthly Project Report
Project Manager & Site Agent
Monthly Project Report

A monthly report covering executive summary, programme status, commercial summary, key risks, H&S and look-ahead. Professional format for board reports and client governance.

£3.99 Buy
Subcontractor Performance Review
Project Manager & Site Agent
Subcontractor Performance Review

A performance review scoring each subcontractor on quality, programme, H&S and commercial on a 1–5 scale with automatic overall average. Objective basis for performance conversations.

£3.99 Buy
Project Milestone Tracker
Project Manager & Site Agent
Project Milestone Tracker

A milestone tracker recording baseline, forecast and actual completion dates with automatic variance in days. Clear programme performance picture suitable for board and client reporting.

£3.99 Buy
Budget vs Actual Cost Report
Project Manager & Site Agent
Budget vs Actual Cost Report

A cost report comparing budget, committed, actual, forecast and variance for each cost code with automatic calculations throughout. Essential monthly tool for managing contract costs.

£3.99 Buy
Quantity Surveyor commercial · cost · change
Subcontractor Payment Tracker
Quantity Surveyor
Subcontractor Payment Tracker

A payment application tracker recording each application, amount applied, certified and variance (auto-calculated), with running totals. Keeps subcontractor payments visible and auditable.

£3.99 Buy
Procurement / Materials Schedule
Quantity Surveyor
Procurement / Materials Schedule

A procurement schedule tracking each package from enquiry to delivery. Records supplier, lead time, required-on-site date, order-by date and status. Keeps procurement on programme.

£3.99 Buy
Cost / Value Reconciliation (CVR)
Quantity Surveyor
Cost / Value Reconciliation (CVR)

A CVR template with automatic margin and margin % calculations by element and running project totals. The standard monthly tool for understanding true project profitability.

£3.99 Buy
Variation / Change Register
Quantity Surveyor
Variation / Change Register

A variation register tracking all contract instructions. Records reference, date, description, instruction source, status, estimated and agreed value with running totals.

£3.99 Buy

Instant digital download (.xlsx). Works in Microsoft Excel and Google Sheets. No refunds on downloaded digital goods.

Unit Converters

Quick conversions for the site office and the trench.

Result

Site Guides

Practical how-much-do-I-need guides for ordering materials on UK sites. Each one links straight to the matching calculator.

Advertisement  ·  leaderboard slot

How Much Concrete Do I Need? A UK Site Guide (2026)

Concrete is the one material you really do not want to get wrong. Order short and you have a cold joint, a part-load surcharge and a gang stood waiting on a second wagon. Order long and you are paying for concrete you are barrowing into a skip. Here is how to work out the volume properly, the way it is done on site.

Start with the volume

Concrete is ordered by volume in cubic metres (m³), so every calculation comes back to length × width × depth — all in metres. The most common slip is mixing your units: a slab measured in metres but a thickness quoted in millimetres. Convert the thickness to metres first (100mm = 0.1m) and the rest falls into place.

If you would rather skip the arithmetic, put your dimensions into the Site Works concrete calculator and it will give you the volume plus an estimate of 20kg ready-mix bags for smaller pours.

Step 1: work out the volume

For a slab or base, it is length × width × thickness. A slab 5m × 4m at 150mm thick is:

  • 5 × 4 × 0.15 = 3.0 m³

For a strip footing, it is length × width × depth. For a column or pad, it is the plan area × depth. Add separate elements together for the total pour.

Step 2: add a waste and over-dig allowance

Ground is never as neat as the drawing. Trenches over-dig, formwork bulges, levels vary and some concrete is always lost in handling. As a working rule:

  • 5% for a clean, formed pour on a hard, accurate dig.
  • 10% for trench fill and footings where the ground is uneven.

So that 3.0 m³ slab becomes around 3.15 to 3.3 m³ once you allow for waste. With ready-mix it is usually worth rounding up to the nearest quarter metre, because a second part-load is expensive.

Ready-mix or mix on site?

For anything over about a cubic metre, ready-mix delivered by wagon is almost always cheaper and better quality than mixing on site. Below that, bagged ready-mix or a site mixer makes sense. As a rough guide a 20kg bag of ready-mix gives around 0.009 to 0.01 m³ once mixed — so roughly 100 bags to the cubic metre, which is a lot of mixing. The crossover where a wagon pays for itself comes quickly.

Get the mix right

When you order ready-mix you will be asked for the strength, usually given as a C grade — C20/25, C25/30, C30/37 and so on. As a rough steer:

  • C20/25 — general fill, blinding, non-structural work.
  • C25/30 — most domestic foundations and slabs.
  • C30/37 — structural slabs, heavier loadings, durability where specified.

Always work to the engineer's specification where there is one. If in doubt, ask — the batching plant would rather get the order right than send the wrong mix.

A quick worked example

Say you are pouring a garage base 6m × 3m at 150mm, with a thickened edge that adds roughly 0.2 m³:

  • Slab: 6 × 3 × 0.15 = 2.7 m³
  • Thickened edge: 0.2 m³
  • Total: 2.9 m³
  • Add 10%: round up to 3.25 m³

That is one clean wagon load rather than gambling on 3.0 and hoping.

Don't forget the pour-day kit

Concrete arrives whether you are ready or not, so have the gear on site the day before — barrows, rakes, a poker or beam for compaction, floats, edging tools, polythene for curing and enough bodies to move it before it goes off. A pour that arrives faster than you can place it is a bad day.

The bottom line

Volume in metres, length × width × depth, add 5 to 10% for waste, round up to the nearest quarter metre for ready-mix, and order the right strength for the job. Two minutes with a tape and a calculator saves the part-load that wipes out your margin.

Estimates here are for guidance. Always work to the structural engineer's design and check against your own setting-out before placing a large order.

Advertisement  ·  in-article slot

How Much Plasterboard Do I Need? A UK Site Guide (2026)

Ordering plasterboard is one of those jobs that looks simple until the wagon turns up two boards short and the whole drylining gang is standing around. Get the count right and you save a return trip, a part-load delivery charge, and a fair bit of swearing. Here is how to work it out properly, the way it is done on site.

Start with the board size

The UK standard plasterboard sheet is 2400 × 1200mm, which covers 2.88 m² per board. You will also see 1800 × 900mm boards (1.62 m²) for tighter spaces and easier handling, and the odd 2700 and 3000mm length for tall walls. Whatever you use, the maths is the same: work out the area to cover, divide by the board area, then add for waste.

If you would rather skip the arithmetic, drop your wall length and height into the Site Works plasterboard calculator and it will give you the board count, screws and tape, plus a layout diagram showing where the off-cuts fall.

Step 1: measure the area

Measure each wall as length × height. For a ceiling, it is length × width. Add the walls and ceilings together for the room.

Do not deduct small openings. A single door or window is rarely worth taking out of the count, because the off-cuts from around the opening usually cannot be reused anyway. Only deduct genuinely large openings such as a wide patio door or a stairwell void.

Step 2: divide by the board area

Take your total area and divide by 2.88 (for standard boards). A room with 40 m² of walls and ceiling needs roughly 14 boards before waste.

Step 3: add a waste allowance

This is where people come unstuck. Cutting waste on plasterboard is real, because a 2400 × 1200 sheet rarely lands neatly on stud centres and ceiling edges. As a rule:

  • 10% for a simple, square room with few openings.
  • 15% for rooms with lots of cuts, angles, reveals or sloping ceilings.

So those 14 boards become around 16 once you allow 10%. Always round up to whole boards.

Don't forget the fixings

Boards are only half the order. For a tidy job you also want:

  • Drywall screws — roughly 25 to 30 per board as a working figure.
  • Jointing tape — scrim or paper tape for every board joint and internal corner.
  • Jointing compound — for taping and filling, plus skim if you are not getting it plastered.

A common mistake is ordering the boards on the Friday and realising on the Monday there is no tape or compound on site. Order them together.

Horizontal or vertical?

On most stud walls boards are hung horizontally, because it puts the joints across the studs and uses fewer linear metres of tape. On taller walls or where you want to avoid a joint at head height, vertical boarding can work out neater. The orientation changes how the cuts fall, which is exactly what the layout diagram in the calculator is there to show you before you order.

A quick worked example

Say you are boarding a 5m × 4m room, walls 2.4m high, plus the ceiling:

  • Walls: perimeter 18m × 2.4m = 43.2 m²
  • Ceiling: 5m × 4m = 20 m²
  • Total: 63.2 m²
  • Boards: 63.2 ÷ 2.88 = 22 boards
  • Add 10% waste: round up to 25 boards

Then add roughly 700 screws, a few rolls of tape and your compound, and that is a clean order.

The bottom line

Measure the full area, divide by 2.88, add 10 to 15% for waste, round up, and order your fixings at the same time. It takes two minutes and saves the part-load delivery that wipes out your margin.

Estimates here are for guidance. Always check against your own setting-out and the board manufacturer's data before placing a large order.

Advertisement  ·  in-article slot

How Much Decking Do I Need? A UK Site Guide (2026)

Decking looks like a simple order until you are halfway through and realise the boards do not run the way you measured, or the joists are too far apart and the whole thing bounces. Get the take-off right at the start and the build goes down clean. Here is how to work out boards, joists and fixings the way it is done on site.

Start with the board coverage

Decking is sold by the board, so the first job is working out how many linear metres of board you need, then how many boards that comes to. UK deck boards are commonly 120mm or 150mm wide, laid with a 5mm gap for drainage and movement. That gap matters — leave it out of your maths and you will over-order, leave it out on site and the boards will cup and trap water.

If you would rather skip the arithmetic, put your deck size into the Site Works decking calculator and it will give you the board count and joists, plus a layout diagram showing how the boards and joins fall.

Step 1: work out the covering width

Take the width of the deck (across the boards) and divide by the board width plus the gap. For 150mm boards with a 5mm gap, each board covers 155mm of width:

  • A 3m wide deck = 3000 ÷ 155 = roughly 20 boards across.

Then multiply by the deck length to get total linear metres, and divide by your board length to get the number of boards to buy.

Step 2: add a waste allowance

Cutting waste on decking is real, especially where boards do not divide neatly into the deck length and you end up with off-cuts that cannot be reused. As a rule:

  • 10% for a simple rectangular deck.
  • 15% for decks with angles, steps, picture-frame edges or changes of direction.

Always round up to whole boards, and buy a couple spare — a damaged or twisted board in the pack is common and you do not want to stop for one board.

Don't forget the joists

The boards are only the top. Underneath you need a joist frame, typically at 400mm centres for domestic decking — closer if the boards run diagonally or the deck takes heavy use. Work out the number of joists as the deck length divided by 0.4, plus one, then multiply by the joist length for your timber order. Under-spacing the joists is the single most common cause of a bouncy, springy deck.

Fixings and the rest of the order

A tidy deck order also wants:

  • Decking screws — stainless or coated for outdoor use, roughly 2 per board per joist crossing. That adds up fast on a big deck.
  • Joist hangers and frame fixings where the frame ties into a wall or posts.
  • Weed membrane under the deck to keep growth down.
  • Post supports or concrete if the deck is raised or freestanding.

A common mistake is ordering the boards and timber but forgetting the deck is held together by a few hundred screws you do not have on site.

A quick worked example

Say you are building a 4m × 3m deck, boards running across the 3m width, using 150mm boards at 3.6m length, joists at 400mm centres:

  • Boards across: 3000 ÷ 155 = 20 rows
  • Each row 4m long, boards are 3.6m, so allow 2 boards per row with an off-cut: roughly 26 to 28 boards once you allow waste, round up to 30 boards
  • Joists: 4m ÷ 0.4 + 1 = 11 joists at 3m each
  • Screws: 20 rows × 11 crossings × 2 = roughly 440 screws, buy a 500 box

The bottom line

Divide the deck width by board width plus the 5mm gap, work out linear metres, add 10 to 15% waste and round up. Space your joists at 400mm, and order your screws and frame fixings at the same time. Get the take-off right and the deck goes down in a day instead of two.

Estimates here are for guidance. Always check board and joist spacing against the manufacturer's span tables and your own setting-out before ordering.

Advertisement  ·  in-article slot

How Much Fencing Do I Need? A UK Site Guide (2026)

Fencing is one of those jobs where the maths is easy but the spacing trips people up. Order the panels without thinking about the posts and you end up one post short, or with a daft little gap to fill at the end of the run. Here is how to work out panels, posts, gravel boards and postcrete properly, the way it is done on site.

Start with the run length

Fencing is worked out along the length of the run. The key number is the panel width, because everything — panels, posts, postcrete — follows from how many panel-and-post bays fit into your run. UK fence panels are most commonly 1.83m (6ft) wide, with 2.4m panels also available for fewer posts on a long straight run.

If you would rather skip the arithmetic, put your fence length into the Site Works fencing calculator and it will give you panels, posts, gravel boards and postcrete in one go.

Step 1: work out the panels

Divide the total run length by the panel width. A 30m run with 1.83m panels:

  • 30 ÷ 1.83 = roughly 17 panels.

Always round up — a part bay at the end still needs a cut-down panel, and you cannot leave a gap.

Step 2: work out the posts

This is where people come unstuck. A fence run always needs one more post than panels, because every panel sits between two posts and the run has to be closed off at both ends. So 17 panels needs 18 posts. Miss this and you are back to the merchant for a single post on the day you wanted to finish.

For most panel fencing you want posts roughly 2.4m long for a 1.8m high fence, allowing for the depth in the ground. Concrete posts last longer than timber and take gravel boards neatly, but are heavier to handle.

Step 3: gravel boards

A gravel board sits at the bottom of each bay, keeping the panel off the wet ground and stopping the bottom rotting. You need one gravel board per panel — so 17 panels, 17 gravel boards. They are cheap insurance against the panels failing early.

Step 4: postcrete

Each post needs setting in concrete or postcrete. As a working figure:

  • 2 bags of postcrete per post for a standard 1.8m fence in normal ground.
  • 3 bags per post for taller fencing, exposed sites or loose ground.

So 18 posts at 2 bags each is 36 bags. Postcrete sets in minutes, so have your posts plumb and braced before you pour — there is no second go.

Setting out matters

Before you order, walk the run and check it is actually straight and the ground is reasonably level. Changes in level mean stepped or raked panels, which changes how the bays fall and can add posts. A sloping run is the most common reason a fence order comes up short. The take-off is only as good as the setting-out.

A quick worked example

Say you are fencing a 24m boundary with 1.83m panels at 1.8m high, in normal ground:

  • Panels: 24 ÷ 1.83 = 14 panels (rounded up)
  • Posts: 14 + 1 = 15 posts at 2.4m
  • Gravel boards: 14
  • Postcrete: 15 × 2 = 30 bags

That is a complete order — panels, posts, boards and fixing — rather than three trips to the merchant.

The bottom line

Divide the run by the panel width and round up for panels, then always add one extra post to close the run. One gravel board per panel, two bags of postcrete per post in normal ground. Check the run is straight and level before you order, because the setting-out is what catches people out, not the arithmetic.

Estimates here are for guidance. Always check panel and post sizes against the supplier's range and your own setting-out before ordering, especially on sloping or stepped runs.

Advertisement  ·  in-article slot

How Much Gravel or Sub-base Do I Need? A UK Site Guide (2026)

Aggregate is sold by weight but laid by volume, and that mismatch is exactly where orders go wrong. Work it out in cubic metres, forget to convert to tonnes, and you either run short halfway across the drive or end up with a bulk bag you cannot return. Here is how to work out gravel, MOT Type 1 and decorative aggregate properly, the way it is done on site.

Start with the volume, then convert to tonnes

Every aggregate calculation starts the same way: area × depth gives you volume in cubic metres, then you multiply by the material's density to get tonnes, because that is how it is sold and delivered. The depth is the number people get wrong — quote it in millimetres, work the area in metres, and convert before you multiply.

If you would rather skip the arithmetic, put your area and depth into the Site Works gravel calculator or the sub-base (MOT Type 1) calculator and it will give you volume, tonnage and the number of bulk bags.

Step 1: work out the volume

Area × depth, both in metres. A driveway 10m × 3m at 50mm of gravel:

  • 10 × 3 × 0.05 = 1.5 m³.

For a sub-base under a drive or patio, the depth is usually much greater — 100 to 150mm of MOT Type 1 is typical, more under a heavily trafficked drive.

Step 2: convert volume to tonnes

Multiply the volume by the density. As working figures:

  • Gravel / decorative aggregate — roughly 1.5 to 1.8 tonnes per m³.
  • MOT Type 1 sub-base — roughly 2.1 tonnes per m³ compacted.

So that 1.5 m³ of gravel at 1.6 t/m³ is around 2.4 tonnes. A standard bulk bag holds roughly 0.5 to 0.8 tonnes depending on the material and supplier, so always check the bag weight when you order rather than assuming.

Step 3: allow for compaction on sub-base

This is the one people miss. MOT Type 1 is laid loose and then compacted with a wacker plate or roller, and it loses volume as it compacts — typically around 10 to 20%. So if you need 100mm of compacted sub-base, you have to lay and order more than the finished depth suggests. Order to the compacted volume plus a margin, or you will be short on the final pass.

Decorative gravel: mind the depth

For a decorative gravel finish, 50mm is the usual depth — enough to cover without the membrane showing through, not so deep that it is hard to walk on. Going much deeper wastes material and makes the surface loose underfoot. For a sub-base under the gravel, that is separate and additional.

Don't forget the membrane

Under almost any gravel or sub-base you want a weed membrane or geotextile — it stops growth coming through and, on softer ground, stops the aggregate disappearing into the subgrade. It is cheap, it goes down in minutes, and leaving it out is the most common reason a gravel drive looks tired within a year.

A quick worked example

Say you are laying a 12m × 3m driveway with 100mm of MOT Type 1 sub-base and a 50mm gravel finish:

  • Sub-base volume: 12 × 3 × 0.1 = 3.6 m³
  • At 2.1 t/m³ = 7.56 tonnes, plus compaction margin, call it 8 tonnes
  • Gravel volume: 12 × 3 × 0.05 = 1.8 m³
  • At 1.6 t/m³ = roughly 2.9 tonnes

Then membrane for 36 m², and that is a complete order.

The bottom line

Area times depth for the volume, multiply by density for tonnes, and check the bulk bag weight before you order. Allow for compaction on sub-base, keep decorative gravel around 50mm, and put a membrane down underneath. Get the conversion right and you order once instead of running back for the last half-tonne.

Estimates here are for guidance. Densities vary by material and supplier — always check the delivered bag weight and your own levels before placing a large order.

Advertisement  ·  in-article slot

What Is MOT Type 1? A UK Site Guide (2026)

Ask three groundworkers what MOT Type 1 is and you will get three answers, all roughly right. It is the most common sub-base material on UK sites, it goes under nearly every drive, path, patio and slab, and getting it right is the difference between a surface that lasts twenty years and one that sinks in two. Here is what it actually is and how to use it.

What the name means

MOT Type 1 is a crushed stone sub-base graded to a specification originally set by the Ministry of Transport — that is where the "MOT" comes from. The "Type 1" is the grading: a mix of stone sizes from around 40mm down to fine dust, all blended so the material locks together and compacts to a dense, stable layer. That range of sizes is the whole point — the big stone gives strength, the fines fill the gaps and bind it solid.

If you need to work out how much you need, the Site Works sub-base calculator gives you tonnage by area and depth.

What it is made from

Type 1 is usually crushed limestone, granite or recycled concrete, depending on what is quarried or processed locally. Recycled Type 1 (from crushed concrete and demolition arisings) is cheaper and perfectly good for most domestic and light-traffic jobs. Virgin quarried stone is used where a higher, more consistent spec is called for. For a driveway or patio, recycled is normally fine.

Why it compacts so well

The graded mix is what makes Type 1 special. Lay it, wet it slightly if it is dry, and run a wacker plate or roller over it, and the fines migrate into the voids between the larger stones and the whole layer knits into something close to solid rock. This is why you never just tip and spread it — uncompacted Type 1 is nearly useless. It must be laid in layers and compacted in passes.

How deep to lay it

Depth depends on what is going on top and what is underneath:

  • Footpaths and patios — 100mm of compacted Type 1 is usually enough.
  • Domestic driveways (cars) — 150mm compacted.
  • Heavy vehicles / regular vans — 200mm or more.

Always lay and compact in layers no more than about 100mm at a time. Trying to compact 200mm in one go just packs the top and leaves the bottom loose.

Don't forget the compaction loss

This catches people out on the order. Type 1 is delivered loose and loses roughly 10 to 20% of its volume when compacted. So if you need 150mm of finished compacted depth, you have to lay more than that loose. Order to the compacted volume plus a margin, or you will come up short on the final pass.

A quick worked example

Say you are building a 10m × 3m driveway with 150mm of compacted Type 1:

  • Area: 30 m²
  • Compacted volume: 30 × 0.15 = 4.5 m³
  • At roughly 2.1 t/m³ = around 9.5 tonnes
  • Add a compaction margin: order about 11 tonnes

Lay it in two 75mm layers, compacting each, and you will have a sub-base that stays put.

The bottom line

MOT Type 1 is graded crushed stone that compacts to a dense, load-bearing sub-base. Lay it in layers, compact every layer, and order extra to allow for compaction loss. Get the sub-base right and whatever goes on top — block paving, tarmac, gravel or slab — has a fighting chance of lasting.

Estimates here are for guidance. Always work to the specified sub-base depth for your loading and check delivered tonnage against your own levels.

Advertisement  ·  in-article slot

Concrete Mix Ratios Explained: A UK Site Guide (2026)

If you are mixing concrete on site rather than ordering ready-mix, the mix ratio is everything. Get it right and you have strong, durable concrete. Get it wrong — too much water, not enough cement — and you have a weak, crumbly mess that fails early. Here is how the common UK mix ratios work and when to use each.

What a mix ratio means

A concrete mix ratio is written as cement : sand : aggregate — for example 1:2:4. That means one part cement, two parts sand, four parts coarse aggregate (stone or gravel), measured by volume. Water is added separately to reach a workable consistency. The ratio controls the strength: more cement relative to the aggregate gives a stronger mix.

If you are working out how much concrete you need in the first place, the Site Works concrete calculator gives you the volume and bag estimate.

The common UK mixes

1:2:4 — general purpose. The standard all-round mix for foundations, footings, and general slabs. Roughly equivalent to a C20 mix. This is the one most people mean when they say "a standard mix."

1:1.5:3 — stronger structural. More cement, so a stronger, more durable mix — roughly C25 to C30. Used for structural slabs, heavier loadings, and anything that needs extra durability.

1:3:6 — weak / mass fill. Less cement, weaker mix. Used for non-structural mass fill, blinding under slabs, and backfill where strength is not critical.

1:4:8 — very weak. Blinding and filling only. Not for anything that carries load.

Getting the water right

Water is where most site mixes go wrong. Too little and it will not work or compact; too much and you drastically weaken the concrete. The aim is a mix that is workable but not soupy — it should hold its shape when you form a heap, not slump into a puddle. As a rough guide, around half the weight of the cement in water, but always add water gradually and stop when it is workable. Every extra litre past what you need is lost strength.

Measuring on site

The classic method is a gauging bucket or a shovel count, keeping the ratio consistent. Using the same bucket for each part is far more reliable than eyeballing shovelfuls, because a shovel of dry cement and a shovel of wet sand are not the same volume. For anything important, batch by bucket.

When to stop mixing on site

Mixing by hand or in a small mixer is fine for small jobs — a few post holes, a small pad, a bit of blinding. But once you are past about a cubic metre, ready-mix delivered by wagon is cheaper, more consistent and far less work, and you can order a guaranteed strength grade rather than hoping your site mix is right. The crossover comes quickly.

A quick worked example

Say you are hand-mixing a small pad using a 1:2:4 mix with a bucket as your gauge:

  • 1 bucket cement
  • 2 buckets sand
  • 4 buckets aggregate
  • Water added gradually to a workable, not sloppy, consistency

Mix dry first until the colour is even, then add water slowly. Consistent buckets, consistent mix.

The bottom line

Mix ratios are cement : sand : aggregate by volume. Use 1:2:4 for general work, 1:1.5:3 for stronger structural concrete, and weaker mixes only for fill and blinding. Keep the water down to keep the strength up, batch by bucket for consistency, and switch to ready-mix once the volume gets past a cubic metre.

Estimates here are for guidance. Always follow the structural engineer's specified mix and strength where one is given.

Advertisement  ·  in-article slot

How to Calculate Fall for Drainage: A UK Site Guide (2026)

Drainage lives and dies on the fall. Too little and the pipe does not self-clean and blocks; too much and the water races away leaving the solids behind, which also blocks. Getting the fall right is one of the most important things you do in groundworks, and it is simple once you know the numbers. Here is how it works.

What fall actually is

Fall is the drop in a pipe or channel over a given horizontal distance — how much lower one end is than the other. It is usually expressed as a gradient ratio like 1:40, meaning the pipe drops 1 unit for every 40 units of length. It can also be given as a percentage or as a fall in millimetres per metre.

If you want it worked out automatically, the Site Works gradient and fall calculator converts run and fall into a ratio, percentage and angle.

The standard drainage gradients

For foul and surface water drainage in the UK, the common working gradients are:

  • 1:40 — for 100mm pipes carrying smaller flows. Steeper, self-cleansing.
  • 1:80 — the typical minimum for 100mm foul drains at normal flow.
  • 1:150 — for larger 150mm pipes.

As a rule of thumb often used on site, 1:40 is a safe general fall for a standard 100mm house drain. The key principle is Maguire's rule — the gradient should roughly match the pipe diameter so the flow stays fast enough to carry solids without outrunning them.

Working out the drop

The maths is straightforward. Drop = length ÷ gradient ratio. For a 10m run of pipe at 1:40:

  • 10 ÷ 40 = 0.25m = 250mm of fall over the 10m run.

So the outfall end sits 250mm lower than the start. Set your invert levels to match and you are away.

Setting it out on site

Two common methods:

Boning rods and a sight line — traditional, using travelling rods and sight rails set to the gradient. Still reliable and used widely.

Laser level — set the laser to the fall and check each pipe as you lay it. Faster and easy for one person.

Whichever you use, check the invert level (the inside bottom of the pipe) at each end and at manholes, not just the top of the pipe. It is the invert that controls the flow.

Why too much fall is also a problem

People understand too little fall blocks a drain, but too much causes the same result by a different route. If the water runs too fast it leaves the solids stranded in the pipe — the liquid outruns the load. That is why you do not just make it as steep as possible. Stick to the recommended gradients for the pipe size.

A quick worked example

Say you are running a 15m foul drain in 100mm pipe at 1:40:

  • Fall: 15 ÷ 40 = 0.375m = 375mm
  • So over the 15m run, the pipe drops 375mm from start to outfall
  • Set the start invert, subtract 375mm for the outfall invert, and set your intermediate levels in proportion

The bottom line

Fall is the drop over the run, written as a ratio like 1:40. Use 1:40 as a safe general gradient for 100mm drains, work out the drop as length divided by the ratio, and set to invert levels rather than pipe tops. Not too flat, not too steep — match the gradient to the pipe and the drain runs clean for decades.

Estimates here are for guidance. Always work to the approved drainage design and Building Regulations Part H where applicable.

Advertisement  ·  in-article slot

How to Read a Setting-Out Drawing: A UK Site Guide (2026)

Setting out is where the drawing becomes the building. Get it right and everything that follows lines up; get it wrong and you are chasing errors through every trade that comes after. Reading the drawing correctly is the first half of the job. Here is how setting-out information is presented and how to work with it on site.

Start with the grid

Most setting-out drawings are built around a grid — a series of reference lines running two ways across the site, usually lettered one way (A, B, C) and numbered the other (1, 2, 3). Every important point on the building is located relative to this grid. Column B3, for instance, sits where gridline B crosses gridline 3. The grid is your framework for everything.

For the geometry checks that go with setting out, the Site Works setting-out tool works out the diagonal of a rectangle so you can prove a right angle.

Coordinates and dimensions

Points are located in one of two ways. Dimensioned drawings give distances from known references — so many metres from a gridline or an existing building face. Coordinated drawings give eastings and northings for each point, which you set out with a total station from known control points. Bigger and more complex jobs tend to use coordinates; simpler ones use dimensions off the grid.

Always check whether dimensions are to the face of an element, its centreline, or its structural grid. Mixing these up is a classic setting-out error — a wall set out to its centreline when the dimension was to its face is out by half its thickness.

Levels and datums

Alongside the plan position, the drawing gives levels — heights relative to a datum. You will see a site datum or a temporary benchmark (TBM), a fixed point of known level that everything else is measured from. Finished floor levels (FFL) and other heights are given relative to this. Establish the TBM on site first and check it before you rely on any level.

Proving a right angle

The 3:4:5 rule is the setting-out worker's best friend. In any right-angled triangle with sides in the ratio 3:4:5, the corner between the 3 and 4 sides is exactly 90°. Measure 3m along one line, 4m along the other, and if the diagonal between those points reads exactly 5m, your corner is square. Scale it up (6:8:10, 9:12:15) for more accuracy over longer runs. Checking the diagonals of a rectangle is the same principle — if both diagonals are equal, the rectangle is true.

Check, then check again

The golden rule of setting out is that a mistake here multiplies through the whole job. Always set out from the drawing, then independently check against a different dimension or diagonal before anyone builds on it. Measure twice, peg once. A ten-minute check saves a demolished wall.

A quick worked example

Say you are setting out a 6m × 4m base:

  • Set out the 6m and 4m sides off your baseline
  • The diagonal should read √(6² + 4²) = √52 = 7.21m
  • Check both diagonals — if they match at 7.21m, the base is square
  • Peg the corners and re-measure all four sides before digging

The bottom line

Read the grid first, know whether dimensions are to face or centreline, establish your datum before setting levels, and prove every corner with the 3:4:5 rule or equal diagonals. Setting out rewards patience and punishes assumptions — get it right on the ground and every trade after you benefits.

Estimates here are for guidance. Always set out from the approved drawings and verify against site control before construction.

Advertisement  ·  in-article slot

Reduced Levels Explained: A UK Site Guide (2026)

Levelling is one of the core skills of site engineering, and reduced levels are how you turn a set of staff readings into actual heights you can build to. It sounds technical but the logic is simple once it clicks. Here is how reduced levels work and how to book them properly.

What a reduced level is

A reduced level (RL) is the height of a point relative to a datum — usually a benchmark of known height. If your benchmark is at 50.000m and a point is 300mm lower, its reduced level is 49.700m. "Reducing" the levels just means doing the arithmetic to turn your instrument readings into these heights.

For the core calculation, the Site Works reduced levels tool works out RL from your benchmark, backsight and foresight.

The three types of reading

When you level with an automatic level and staff, every reading is one of three kinds:

  • Backsight (BS) — the first reading, taken onto a point of known level (the benchmark or a change point). It is how you establish the height of the instrument.
  • Foresight (FS) — the last reading before you move the instrument, taken onto a change point or your final point.
  • Intermediate sight (IS) — any reading taken in between, onto points you want the level of.

Height of collimation — the simple method

The most common site method is height of collimation (or height of plane of collimation). The logic:

  • Height of collimation = known benchmark level + backsight reading
  • Reduced level of any point = height of collimation − staff reading at that point

So if your benchmark is 50.000m and you read 1.500m on it, your height of collimation is 51.500m. Then any point where you read, say, 1.800m, has a reduced level of 51.500 − 1.800 = 49.700m. Higher staff reading means lower ground, which trips people up at first — remember the staff reads more where the ground is lower.

Booking it out

Levels are booked in a level book (or the Site Works Level Book template), with columns for BS, IS, FS, height of collimation and reduced level. Fill each reading in its correct column as you go. The discipline of booking properly is what lets you check your work.

Checking your arithmetic

There is a built-in check. The sum of all backsights minus the sum of all foresights should equal the difference between the first and last reduced levels:

  • Σ BS − Σ FS = Last RL − First RL

If those two do not match, you have made an arithmetic error somewhere in the booking. This check is why levels are booked in a structured table rather than scribbled down — it catches mistakes before they reach the ground.

A quick worked example

Benchmark at 50.000m, instrument set up:

  • Backsight on benchmark: 1.200m → height of collimation = 51.200m
  • Intermediate sight at point A: 1.500m → RL = 51.200 − 1.500 = 49.700m
  • Foresight at point B: 0.900m → RL = 51.200 − 0.900 = 50.300m

Point A is 300mm below the benchmark, point B is 300mm above it.

The bottom line

A reduced level is a height relative to a datum. Establish your height of collimation from a backsight on a known point, then subtract each staff reading to get the level of that point. Book everything in the right column, and always run the Σ BS − Σ FS check against your first and last levels. Level carefully and the whole job builds to the right height.

Estimates here are for guidance. Always level from a verified benchmark and check your bookings before setting levels on site.

Advertisement  ·  in-article slot

How to Calculate Rebar Weight: A UK Site Guide (2026)

Reinforcement is ordered and priced by weight, so knowing how to work out the weight of a bar is a core skill for anyone in groundworks, concrete or QS work. Whether you are checking a delivery, pricing a job or ordering steel, it comes down to one simple formula. Here is how it works.

The formula that does everything

The weight of a steel reinforcing bar is worked out with the d²/162 rule:

  • Weight per metre (kg/m) = d² ÷ 162

Where d is the bar diameter in millimetres. This gives the weight of one metre of bar in kilograms. It comes from the density of steel and is accurate enough for all practical ordering and checking.

The Site Works rebar weight tool does this for you across length and quantity, but it is worth knowing the numbers.

The standard bar weights

Run the formula for the common UK bar sizes and you get the weights worth memorising:

  • 8mm — 0.395 kg/m
  • 10mm — 0.617 kg/m
  • 12mm — 0.888 kg/m
  • 16mm — 1.579 kg/m
  • 20mm — 2.470 kg/m
  • 25mm — 3.855 kg/m
  • 32mm — 6.313 kg/m
  • 40mm — 9.864 kg/m

If you know a job is mostly 12mm and 16mm bar, those two figures — roughly 0.89 and 1.58 kg/m — cover most of what you will estimate.

Working out a total

To get the total weight of a batch of bars, multiply the weight per metre by the length of each bar and the number of bars:

  • Total weight = (d² ÷ 162) × length per bar × number of bars

So 50 bars of 16mm rebar, each 6m long:

  • Weight per metre: 16² ÷ 162 = 1.579 kg/m
  • Per bar: 1.579 × 6 = 9.47 kg
  • Total: 9.47 × 50 = 474 kg

Why it matters on site

Three reasons you will use this regularly:

Checking deliveries. Rebar is sold by weight. Knowing the weight per metre lets you check that what turned up matches what was ordered and charged.

Pricing. For a QS or estimator, converting a bar schedule into a tonnage is how you price the reinforcement package.

Lifting and handling. Knowing the weight of a bundle matters for safe lifting and for planning how it gets moved around site.

Reading a bar schedule

On a reinforcement drawing you get a bar schedule listing each bar mark, its size, shape, length and number. To get the total steel tonnage, you run the weight calculation for each line and add them up. It is repetitive but simple, and it is exactly the kind of thing a spreadsheet handles well.

A quick worked example

Say a schedule calls for 120 bars of 12mm at 4m and 80 bars of 20mm at 5m:

  • 12mm: 0.888 × 4 × 120 = 426 kg
  • 20mm: 2.470 × 5 × 80 = 988 kg
  • Total: 1,414 kg, call it 1.41 tonnes

The bottom line

Rebar weight is d² ÷ 162 kilograms per metre, multiplied by length and quantity. Learn the common bar weights, use them to check deliveries and price schedules, and total up a bar schedule line by line. One simple formula covers ordering, checking and estimating all your reinforcement.

Estimates here are for guidance. Always work to the approved bar schedule and reinforcement drawings.

Advertisement  ·  in-article slot

How Much Mortar Do I Need? A UK Site Guide (2026)

Mortar is easy to under-order because it disappears into the joints and you never quite picture how much a wall swallows. Run out mid-lift and the gang stops; mix too much and it goes off in the barrow before you use it. Here is how to work out mortar for brick and blockwork the way it is done on site.

Start with the brick or block count

Mortar quantity follows directly from how many bricks or blocks you are laying, because most of the mortar goes into the bed and perp joints between them. So the first step is always the unit count — work that out, and the mortar follows.

The Site Works mortar calculator takes your brick count and gives the mortar volume and a rough bag count.

The working figures

As reliable rules of thumb for standard UK work:

  • Bricks — roughly 0.5 to 0.6 m³ of mortar per 1,000 bricks laid.
  • Blocks — roughly 0.5 m³ of mortar per 100m² of blockwork (fewer, larger units means fewer joints per square metre).

These allow for normal joint thickness (10mm) and a bit of waste. They are working figures, not laboratory numbers, but they will get your order right.

What the mortar is made of

Standard bricklaying mortar is cement, sand and usually a plasticiser or lime for workability. A common mix is 1:5 or 1:6 cement to sand for general work, or 1:1:6 cement:lime:sand where lime is used. From your mortar volume you can work back to the materials:

  • Roughly 1 tonne of building sand and about 6 to 8 bags of cement per cubic metre of mortar, depending on the mix.

Why waste matters more with mortar

Mortar waste is real and higher than people expect. Some is dropped, some goes off before it is used, some is left in the mixer and barrow. A 10% allowance is sensible, more if the gang is working in hot or windy weather when mortar dries out faster. Mixing in smaller, more frequent batches reduces waste because less sits around going off.

Don't mix more than you can lay

The practical trap with mortar is not the calculation, it is the batch size. Mortar starts going off as soon as it is mixed, and once it has stiffened past workable it is waste. Mix what the gang can lay in the working time, not a giant batch that half-sets in the barrow. This is why the material order and the mixing plan are two different things.

A quick worked example

Say you are laying a single-skin wall of 2,000 facing bricks:

  • Mortar: 2,000 ÷ 1,000 × 0.55 m³ = 1.1 m³
  • Add 10% waste: about 1.2 m³
  • Materials: roughly 1.2 tonnes of sand and 8 to 9 bags of cement for a 1:6 mix

Then mix it in batches the gang can lay before it goes off.

The bottom line

Work out the brick or block count first, then apply roughly 0.5 to 0.6 m³ of mortar per 1,000 bricks, add 10% for waste, and work back to sand and cement from the volume. Order the materials in one go but mix in small, frequent batches so none of it sets before it is laid.

Estimates here are for guidance. Actual mortar use varies with joint thickness, workmanship and conditions — always allow a sensible margin.

Advertisement  ·  in-article slot

How Much Paint Do I Need? A UK Site Guide (2026)

Paint is one of the easiest things to get wrong on an order — buy too little and you are back to the merchant hoping the batch matches, buy too much and you have half-empty tins cluttering the store. The maths is simple once you know the coverage figures. Here is how to work it out.

Start with the area and the coverage

Paint quantity comes down to two numbers: the area you are covering and how far a litre of that paint goes. Divide one by the other, multiply by the number of coats, and you have your litres. Everything else is detail.

The Site Works paint calculator turns wall area and coats into litres and UK tin sizes.

Typical coverage figures

Coverage — the spread rate — varies by paint type and surface, but as working figures per litre per coat:

  • Matt emulsion — around 12 to 14 m² per litre.
  • Silk / soft sheen emulsion — around 12 m² per litre.
  • Gloss / satinwood — around 12 to 16 m² per litre.
  • Primer / undercoat — around 10 to 12 m² per litre.
  • Masonry paint — around 6 to 10 m² per litre (rough surfaces drink it).

Always check the tin — the manufacturer prints the spread rate — but these get you close for ordering.

Step 1: work out the area

Measure the walls as length × height and add them up. For a ceiling, length × width. You generally do not deduct doors and windows unless they are large, because the cutting-in around them uses paint anyway.

Step 2: account for coats

This is where people under-order. Almost nothing is done in one coat. Bare or patchy surfaces usually need two coats of emulsion, sometimes a mist coat first on new plaster. A strong colour change may need three. Multiply your single-coat figure by the number of coats you are actually doing.

Step 3: mind the surface

A rough, porous or previously unpainted surface soaks up far more than a smooth, sealed one. New plaster needs a thinned mist coat first. Bare masonry can take nearly double what a smooth wall does. When in doubt on a thirsty surface, round up.

A quick worked example

Say you are painting a 4m × 3m room, walls 2.4m high, two coats of matt emulsion at 13 m²/litre:

  • Wall area: perimeter 14m × 2.4m = 33.6 m²
  • Two coats: 33.6 × 2 = 67.2 m² of coverage needed
  • Litres: 67.2 ÷ 13 = 5.2 litres
  • Round up to a 5L tin plus a 2.5L tin, or a 5L and use leftovers for touch-ups

Buy the right tin sizes

UK emulsion comes in 2.5L, 5L and 10L tins. Working out your litres then picking tin sizes to match avoids the trap of buying three 2.5L tins when a 5L and a 2.5L is cheaper and less wasteful. And buy the same batch number where you can — different batches of the same colour can vary slightly.

The bottom line

Measure the area, divide by the paint's coverage figure, multiply by the number of coats, and round up to sensible tin sizes. Allow extra for porous or bare surfaces and new plaster. Get the coats right — most jobs are two — and you will not run out halfway up a wall.

Estimates here are for guidance. Always check the manufacturer's stated coverage on the tin, especially for masonry and specialist paints.

Advertisement  ·  in-article slot
Advertisement  ·  in-content rectangle slot

Order from UK suppliers

Affiliate links — swap each href for your tracked Screwfix / Toolstation / Wickes / Travis Perkins / Amazon Associates link.

Site Works — free construction site tools.
Materials, site engineering & QS take-off.
All outputs are estimates for guidance only and not a substitute for professional measurement, design or contract advice. Take-off accuracy depends on correct scale calibration — always verify against the drawing. Some links are affiliate links.